


It is necessary to provide the dates when discussing the fighting at Longstop Hill, because the hill was contested in a series of actions from 22-25 December 1942, and in the spring of the following year. This scenario represents the first two phases of the battle in December — the attack of the British Coldstream Guards vs. elements of the German 754th Infantry Regiment on the night of 22-23 December, followed by the counterattack of the 1st Battalion, 69th PanzerGrenadier Regiment vs. the American 1st Battalion, 18th Infantry Regiment on the following day. Because we only had four players, we focused on the fighting that took place on the hill itself, rather than all of the fighting in the area, which enabled us to employ no more than two companies per side at any given time. Because the forces in this game would be used again in a following game, the players were advised to be mindful of their casualties — advice that they ignored!

Pages 338 to 342 of this book provide some historical background:
HyperWar: US Army in WWII: Northwest Africa: Seizing the Initiative In the West


Terrain: The twin peaked hill that was nicknamed “Longstop Hill” by the Allies is locally known as Djebel el Ahmera (Point 290) and Djebel el Rhar (Point 243) — the nickname refers to a fielder’s position in cricket. The hill mass is located about seven miles NE of Medjez-el-Bab (see our previous reports) and it overlooks the Medjerda river which flows past the hill about 1/2 mile to the SE. The hill is roughly two miles long and one mile wide, with its long axis running SW-NE, which is how our table was laid. Our model hill was built up with several layers of coir doormats — using full-sized mats and pieces — topped with styrofoam hill shapes for the two summits and the various ridges and knobs, all placed under our mat. This gave us a good-sized and sturdy hill, that was easy to transport, set up and take down. The hill is covered with scrub, and we ruled that the maximum sighting distance through the scrub was 8 inches, but in places it was possible to see over the scrub due to the undulations of the hill. The underlying soil of the hill is rocky, making it very difficult to dig in. The terrain surrounding the hill was farmland, and a railroad station was located near the NE end of the hill, but none of this low-lying terrain was very relevant to this game.


One very important thing to note is that the British were unaware that the hill had two summits — they were only aware of Djebel el Ahmera (Point 290). So we did not place the second summit on the table during the first phase of our game, to keep the Allied players in the dark.

Also, the first phase of the battle was fought at night, and the entire battle took place in heavy rain. So maximum visibility at night would be limited to 4-12 inches as determined by a roll of two dice each turn (with a minimum distance of 4 inches), although muzzle flashes could be seen at any distance.

Objective: The only objective for both sides was to control the summit of Point 290 at the end of the second phase of the scenario.


First Phase Forces and Deployments:
The forward line of defense for the Germans was held by one company of the 754th Infantry Regiment. The 754th was a recently formed unit that had been rushed to Tunisia equipped only with small arms and a limited amount of ammunition. We accordingly rated these troops as Reluctant/Aggressive/Green. The German commander deployed this company with all three platoons in a single line, about halfway up the SW face of the hill, with the company HQ and a platoon of four HMGs deployed to the rear of the center platoon. As this company had just reached its positions, it was not dug in.

Arriving from the SW, the British force consisted of two rifle companies of Coldstream Guards, rated as Confident (Fearless for counterattack and last stand checks) /Aggressive/Veteran. The Guards were supported by one off-table battery of 25-pdr. artillery, which was registered on the summit of Point 290. (Historically, this attack was supported by a battalion of artillery, but the rain hindered radio communications, and the darkness limited spotting; so we reduced artillery support to one battery with no special limitations.) The forward observer was deployed to the rear, with a good view of the SW face of the hill. The two rifle companies deployed side-by-side and went up the hillside like a line of beaters on a Highland deer hunt.
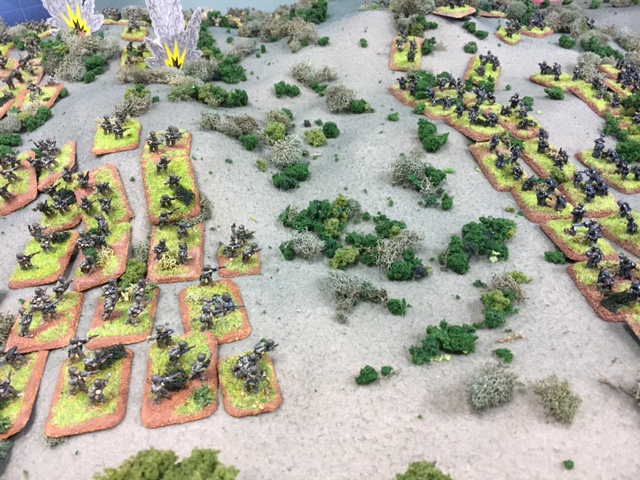
First Phase Moves: The British preliminary bombardment fell on the summit, which was unoccupied. The Guards advanced up the hill until they drew fire from the defenders, then halted and fired back. The exchange of fire in the darkness resulted in a few casualties on both sides, and enabled the British F.O. to range the artillery on the conspicuous muzzle flashes of the German HMG platoon. Once the German base of fire was suppressed, the Guards resumed their advance, and launched assaults across the entire line. German defensive fire was hindered by the terrain and the darkness, but still managed to claim some attacking teams, and repulsed the assault in the center. But the assaults on both flanks went in, and once in close combat, the superior skill and morale of the Guards won out, and both German flanks were pushed back with heavy losses. The German center held on for a bit longer, but was soon overwhelmed by converging attacks from all sides. Thus the first phase of the game ended with the summit of Point 290 in Allied control. British losses totaled less than two platoons, and the German company was written off.


So far, the results in our game had matched the opening phase of the historical battle (although our game was bloodier). Historically, the British attacked Point 290 with two companies, and the green German troops resisted until their ammunition ran out, leaving Point 290 in British hands. Not knowing there was a second summit less than 1000 feet away in the darkness, the British halted and took up defensive positions on the hill, assuming they had captured the entire hilltop. (The other two companies of the Guards battalion were operating in the valley below and were pushed back from the railroad station, which had been their objective — if we had more players, we would have included this action in our game). Later in the night, the 1st Battalion of the US 18th Infantry Regiment arrived to relieve the Guards. The relief was very disorderly, which resulted in some American units being in the wrong positions, and only a few units were dug in. The Guards (and their supporting artillery battalion) departed at 0430 on 23 December, leaving the Americans on their own. When the sun rose, the Americans realized that they only held half of the hill. The Germans attacked shortly after dawn. This is the point where the second phase of our game began.

Second Phase Forces and Deployments:
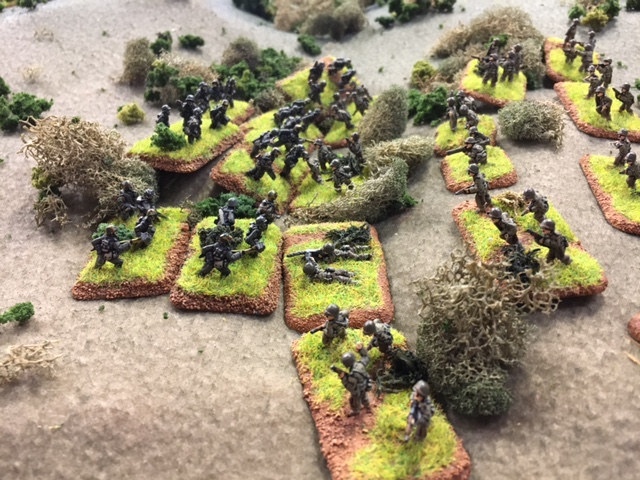
The American force on the hill consisted of two rifle companies and two heavy weapons platoons (with 3 X 60mm mortars and 4 X LMGs in each). These raw troops were rated Confident/Aggressive/Green. The American commanders placed their units on the hill, with their defenses centered on the summit of Point 290. We then rolled to determine whether each platoon would remain where it was placed or be displaced in a random direction, which simulated the confusion of taking up their positions in the dark. Each platoon then rolled to determine whether it would begin the game dug in, with a 1/3 chance of succeeding. The dice rolls resulted in the Americans being mostly deployed in the right places, but only the mortars in the rear were dug in. Late in the game, the British off-table artillery would return, and would be available to support the Americans.

The German force consisted of two companies of PanzerGrenadiers, supported by eight HMGs, a battery of 81mm mortars, and an off-table 105mm howitzer battery which was registered on the summit of Point 290. The battle hardened Germans were rated Confident Veteran. The German commanders deployed their units on and around Point 243, which we placed on the table, revealing the second summit to our American players.


Second Phase Moves: The German preliminary bombardment landed on Point 290, damaging and pinning the US defenders there. The Pz.Gd. company on the German right pressed forward immediately, attacking the center and left of the American position. The attack in the center went well and pushed the Americans off of the summit. The attack on the German right was met with heavy defensive fire and was repulsed. German mortar fire was called to support the Pz.Gds. as they regrouped. Very little forward progress was made by the Germans on this flank, and both sides continued to suffer casualties to mortars and small arms.


The Pz.Gd. company on the German left made a more deliberate attack on the American right flank, using its machine guns and small arms to sweep the American positions with fire (the two sides were separated by a ravine, so direct fire between the opposing lines was possible over the brush). The German 105mm battery added its fire after it stopped bombarding the summit. Once the defenders had been attritted and pinned down, the Pz.Gds. went forward to assault. American defensive fire was still heavy, but one German platoon made it into close combat and must have gone berserk, because it eliminated all but one of the defending teams, which forced the entire American line in this sector to fall back.


Regardless of the outcomes of the fighting on the flanks, victory in the game would depend on control of Point 290. The British artillery returned, and ranged in on the Germans occupying the hilltop, reducing their numbers and pinning them. This enabled the US company commander to rally some survivors around him and advance back up to the summit. The US commander prudently did not assault the handful of Germans still occupying the summit, but he was close enough to the objective to contest it, bringing this epic game to a drawn conclusion!

Losses to both sides were heavy, with the Germans losing almost a full company, and the Americans losing more than a full company, along with most of their LMGs. These losses will reduce the forces available in our next game, which will cover another phase of this battle for Longstop Hill.

Our next battle report will advise the historical results of this phase of the battle, and then we will fast-forward the action to the final phase of the battle on 25 December. Will it be a Merry Christmas for the Axis or the Allies? Stay tuned!

- TJ